Written by Jeremy Byler, CETsr
How to Remotely Add or Update a DTR Radio Contact to your Fleet
 Motorola DTR650 digital radios can be programmed with a unique ID so other users can identify the person transmitting. Most of our customers request that we program their radios with employee names or job functions. This is helpful during emergencies, call alerts, and one-to-one communications.
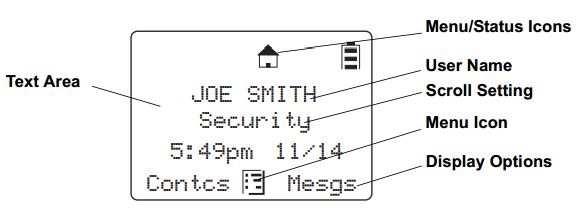
When an additional radio is purchased, replaced, or updated the digital ID must be programmed in all of the existing radios. This is easily accomplished using the DTR650’s over-the-air programming feature.
All DTR Radios Must Be Turned “ON” and In Range
After the new radio is programmed using Motorola’s DTR CPS software and programming cable, begin by inserting the battery and connecting the antenna. All radios must be powered ON and within range of the new DTR for programming to be successful.
Use Cloning Mode to Add Contacts Wirelessly
To place the new radio in cloning mode a series of button presses is required. Refer to the picture for button locations and follow the steps below: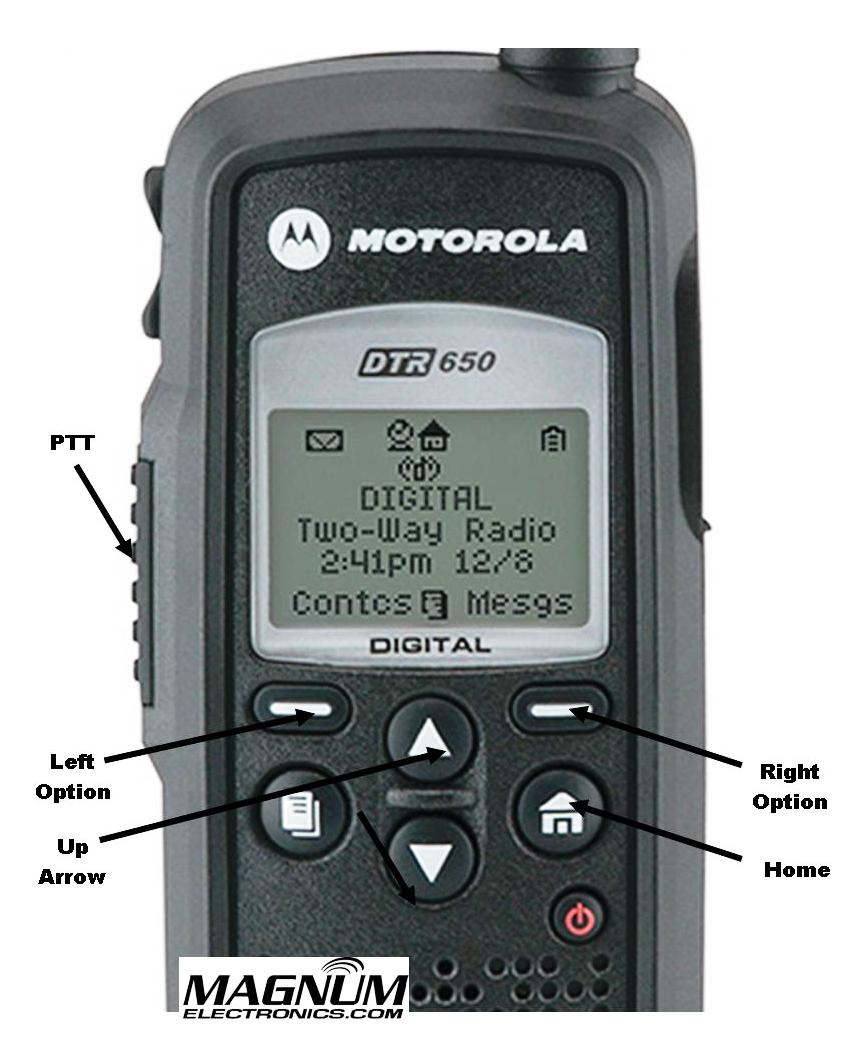
- Hold down the “Home” button and press the PTT (push-to-talk) button three times
- Press the “Left Option” button
- Press the “Up Arrow” button
- Press the “Right Option” button
- Hold down the “Home” button and press the PTT button three times
- When done correctly screen will display cloning mode
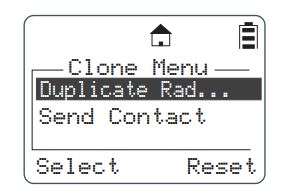
From Cloning Menu Choose “Send Contact”
When the DTR is in cloning mode, scroll to the “Send Contact” and choose the contact you want to send to the other radios per steps 1-3 below.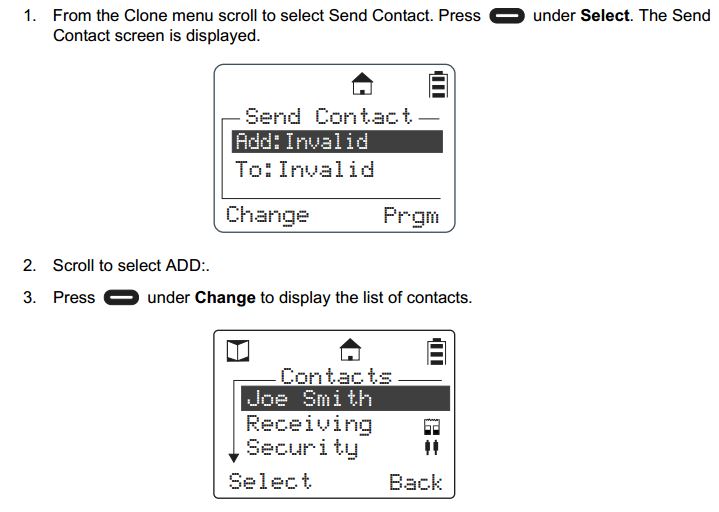
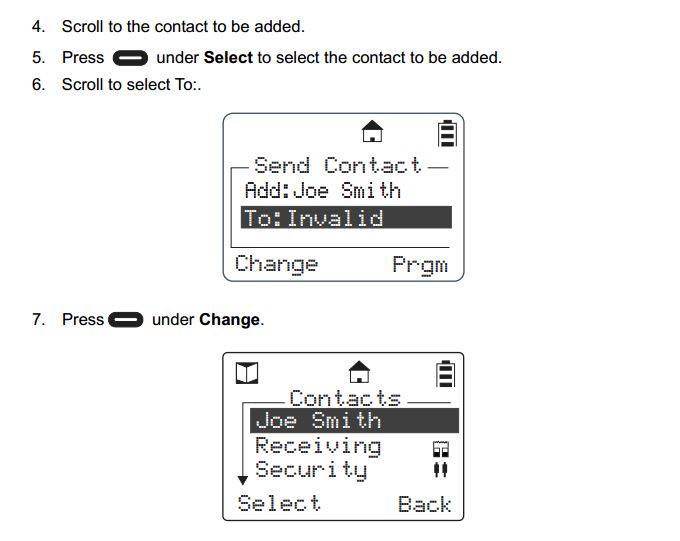
Select the Contact You Want to Send to the Other DTR Radios
Steps 4-7 shows how to scroll through the list of radio contacts and change to the one you want to send to the other radios in your fleet.
Press “Program” and “Go” to Finish the Cloning Operation
Steps 8-11 include selecting the target radio or radio group and sending the info wirelessly using the “Program” and “Go” soft buttons.
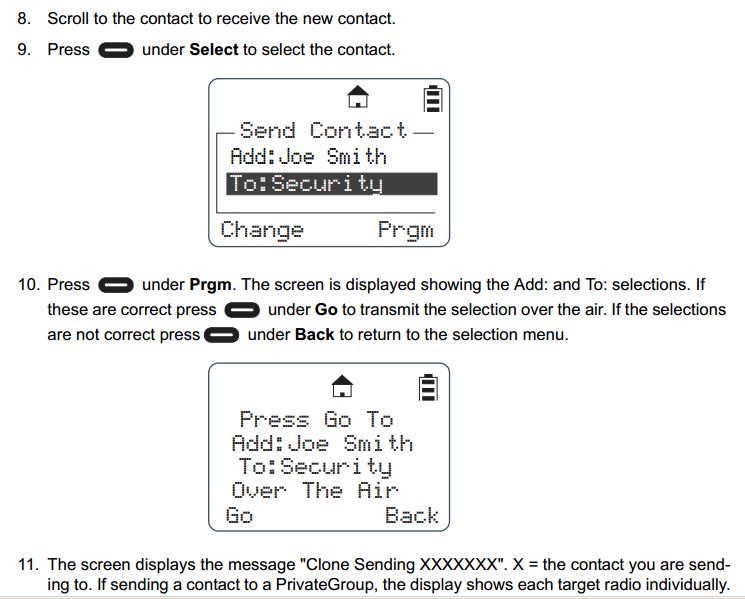
After operation is completed, a status message will appear. It will either display “Successful” or show a list of radios that failed. A radio will fail if it is powered off or is out of range.
If only a single radio needs to be updated, choose the name of the radio that needs to be updated instead of the group. Once this operation is successfully completed and all your radios have been updated with the new radio’s contact information, your DTR system will communicate properly.
For more information download the Motorola DTR Series User Guide and the Generation 3 DTR650 Product Training presentation from Motorola Solutions.
